Nested VMware ESXi with virtualbox
Overview
For testing cases it could be very useful to host a nested (= virtualized) VMware ESXi on your desk or laptop machine. For my own needs, I had to install an ESXi on virtualbox. Here is my tutorial.
Installation
Prerequisites
In order to install an ESXi 5.5 you'll have to provide:
- 64-bit x86 processor with at least 2 cores
- 4 GB of RAM (we'll see how to deal if you don't have/want to give 4GB of RAM to the nested ESXi)
- Intel-VT or AMD-V compatible processors
- 1 GB of disk for system
In order to create small virtual machines for tests, you'll have to add more disk space, in a second device.
You'll also need an ESXi iso file for installation.
ESXi Virtual Machine creation
In virtualbox, create a new virtual machine with following settings:
- Choose the name
- Type: Linux
- GuestOS: Other Linux (64-bit)
- Memory: >= 4GB (or less if necessary)
- Create a new virtual disk device
- Choose one of disk type choice (no big difference)
- Dynamic space allocation
- Size: 1GB
When virtual machine is created, edit settings to set 2 vCPU cores:

Edit VM CPU settings
Then mount the iso file to the DVD device:
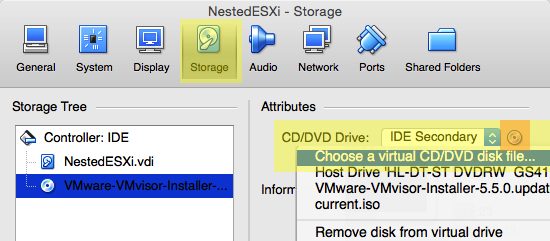
Add ISO file to the virtual machine
Then you can edit the network settings (I need to use the existing local network so I used "bridged adapter" setting:
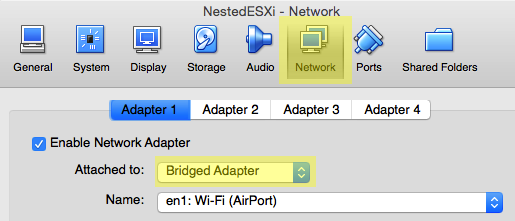
Change network adapter settings
Then save changes in configuration and start virtual machine.
ESXi installation and setup
ESXi installer will be automatically started on the virtual machine. During the process, installer will load some libraries and modules and check the available "hardware" on the virtual machine. According to the hardware settings, it could take some time before the first human action:
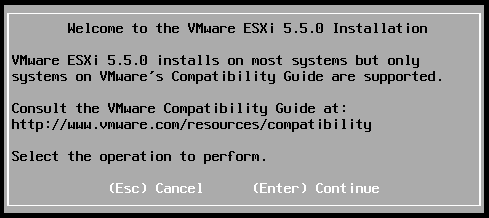
First human action in ESXi installation process
(optional) Bypassing the minimal requirements check
If you give less than minimal requirements to your nested ESXi virtual machine. You'll we need to bypass the requirements checks to be able to install ESXi. To do so, open ESXi console by pressing [ALT]+[F1].
Then login with "root" and no password:
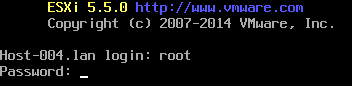
Login to the ESXi console
When logged in:
$ cd /usr/lib/vmware/weasel/util
$ rm upgrade_precheck.pyc
$ mv upgrade_precheck.py upgrade_precheck.py.old
$ cp upgrade_precheck.py.old upgrade_precheck.py
$ vi upgrade_precheck.py
You'll need to find the following line (simple way is to type [ESC]+/MEM_MIN):
MEM_MIN_SIZE = (4*1024) * SIZE_MiB
Change the "4" according to the number of GB you can give to your machine:
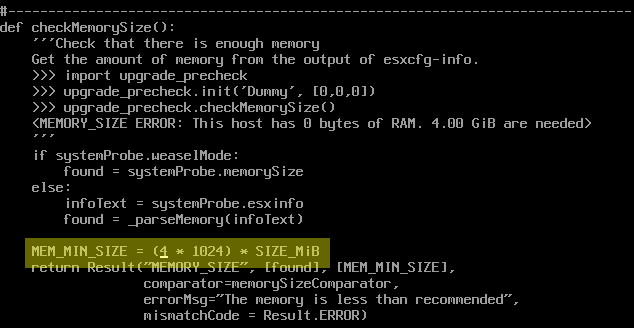
Bypassing min-memory check
Save file and exit: [ESC]+:wq!
Kill the installer process:
$ ps -c | grep weasel
$ kill –9 <PYTHON PROCESS ID>
Then go back to the installer mode: [ALT]+[F2]
Back to the installation
- Press [Enter] to start installation process.
- [F11] to accept EULA
- Select the vbox disk for system installation and press [Enter]:

Select boot device
- Select a keyboard layout according to your computer and press [Enter]
- Enter a password and confirm
- Then wait for hardware checking process
- Installer will warn you about one or more hardware settings but should let you finish the installation process by pressing [Enter]:
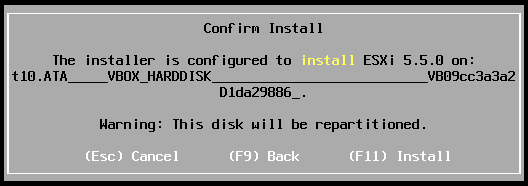
Last step of installation process
- Press [F11] to start installation on disk.

Installation in progress
When ended, you can restart the virtual machine and enjoy your new ESXi installation.
Customize your nested ESXI
Following step are optional.
IP settings
If you use the bridge network adapter and don't have a DHCP server, you may have to set the IP settings to the ESXi:
When ESXi is started, press [ALT]+[F2] to open "edit settings" panel and login:
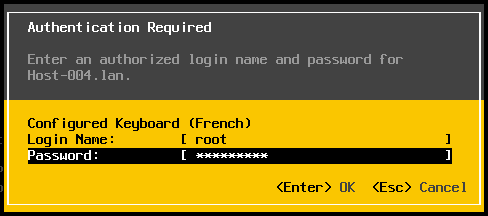
Login to the ESXi console
Select Configure Management network:
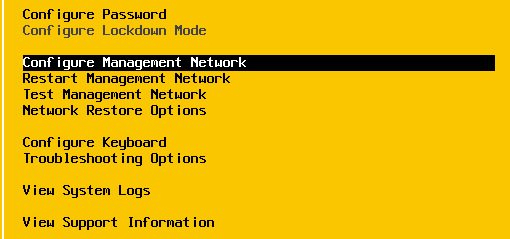
Configure management network
Edit IP settings according to your LAN or your needs:
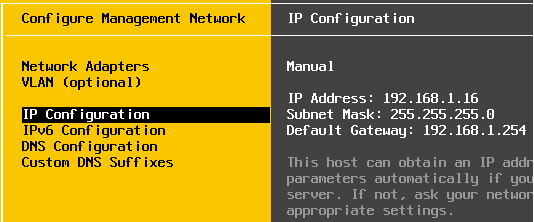
Change IP settings
Once it's done, press [ESC] then [Y] to validate and apply changes.
SSH Server
To simplify the access to the ESXi command line tools, I use the embedded SSH server. To enable it:
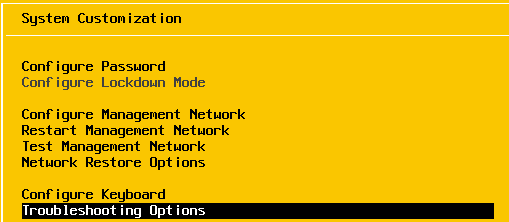
Enable SSH server in troubleshooting options
Then enable SSH server by selecting Enable SSH and pressing [Enter]:
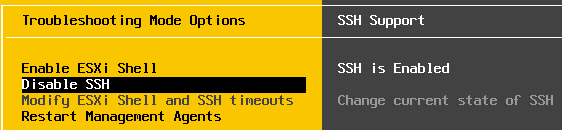
Enable SSH server
Now you can login to your server by ssh:
$ ssh root@192.168.1.16
Password: **********
The time and date of this login have been sent to the system logs.

VMware offers supported, powerful system administration tools.  Please
see www.vmware.com/go/sysadmintools for details.

The ESXi Shell can be disabled by an administrative user. See the
vSphere Security documentation for more information.
~ # hostname
NestedESXi55.lan
I prefer to use SSH key to login. To copy you public key to the ESXi server:
$ cat ~/.ssh/id_rsa.pub | ssh root@192.168.1.16 "cat - >> /etc/ssh/keys-root/authorized_keys"
Password: *********
Then you can check the correct behavior of login with SSH key:
$ssh root@192.168.1.16
The time and date of this login have been sent to the system logs.

VMware offers supported, powerful system administration tools.  Please
see www.vmware.com/go/sysadmintools for details.

The ESXi Shell can be disabled by an administrative user. See the
vSphere Security documentation for more information.
~ # hostname
NestedESXi55.lan
Conclusion
Installing a nested VMware ESXi on virtualbox is an easy way to test commands or to get used to ESXi command line usage. As we can bypass the minimal requirements checks, you do not need a huge computer to run the famous enterprise-class, type-1 hypervisor. But with this kind of configuration, you'll not be able to run several virtual-machines in good conditions.